Online / Offline Tools For MicroTiles
 After all the excitement last week surrounding Christie Digital’s announcement of the MicroTiles display system, you may be wondering how to understand the technology and use it for real. Even if you haven’t seen it up close, you can get a feel for how it all fits together by exploring a couple of tools available on the MicroTiles website.
The MicroTiles Designer page provides a link to download the Designer application. This is downloaded and installed on a PC, more of which later.
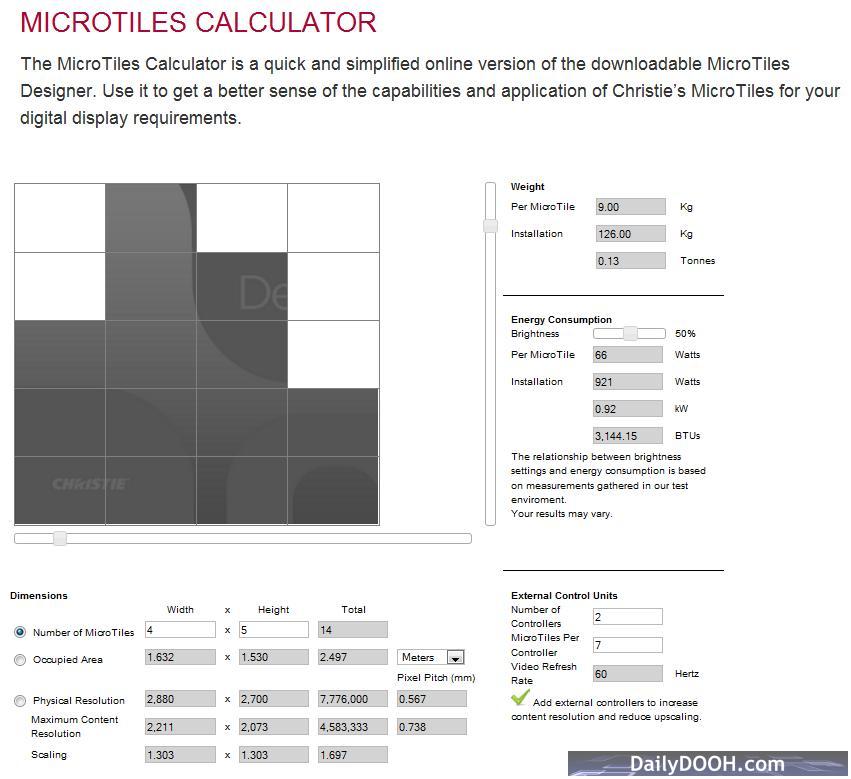
Also on the same page is the MicroTiles Calculator, not as comprehensive as the Designer application, but a simpler online version you can just use without the bother of having to install software. It’s big advantage is that you can dive straight in and create a screen array pretty easily.
You use the sliders to select how many tiles you want in the square grid, and click on tiles to mark them present or not (holes), and so build your custom screen shape. As you are doing this, all the key parameters like total screen dimensions, power consumption, weight and screen resolution are updated in real time. This is great for trying out lots of ‘what ifs’ really easily while planning a potential installation, or just researching a proof of concept.

Skyscraper screen in the MicroTiles Calculator
Apart from the physical parameters, you can also experiment with the relationship of the maximum pixel capability of the tiles, and the resolution of the content you would need to display on them. Each individual tile can display up to 720 x 540 natively, or the system can automatically scale lower resolutions across the screen area. Each controller unit (a small electronics box separate to the tiles) can drive up to about 6 tiles at their native resolution giving the best possible pixel pitch of 0.56mm – one of the reasons that images can be displayed in such high quality. For larger screen sizes you can add controllers to keep the quality ultra high, or you can have one controller drive the whole screen, but then scaling kicks in and the pixel pitch rises. Depending on your application, a lower resolution may be fine, especially if the viewing distance is greater. It all depends on the quality of the image display required, balanced with the available content, budget and playout infrastrucure – more controllers means more player outputs will be needed to drive them.
You can see all this in even more detail in the Designer application, which includes all of the Calculator features and merges that with graphics design tools. You can import or draw a background image, build your screen display into it and show sample content on the screen for a complete visualisation.

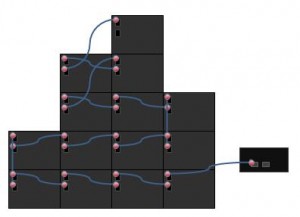
Cabling at the back of the Skyscraper
You can look at a back view of the tiles and even get the application to cable up the controller(s) and all the tiles together. This reveals that a controller is daisy chained round to all of the tiles with DisplayPort cables – an open standards interface which carries both the video signal and internal discovery and calibration communications between the controller and tiles.
Here is the back of the Skyscraper screen. It’s has only one controller attached to it in this example for simplicity, the actual version is running at higher resolution with two controllers, but you get the idea. You can also complete the loop back to the controller to add redundancy to the signal path.
The application can be a little quirky in places (and this version is clearly labelled as a beta), but it is powerful nonetheless. You can tell as you discover all of the different features of the MicroTile system, and put example systems together, that a lot of quality thought and engineering has gone in to the product.

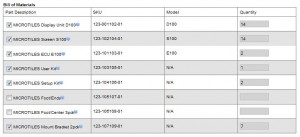
Bill of Materials listing
A nicely thought out touch is that both tools produce a bill of materials list, so that when you’ve finalised the screen design and it comes to ordering the kit, the part numbers and quantities are listed out ready to send straight over to Christie.
Categories: DailyDOOH Update